Creating and Editing Models
Creating and editing models in SketchUp for Web is a lot like creating models in SketchUp for Desktop. However, there are a few things that SketchUp for Web does that are a bit different than its desktop counterpart.
Note: While SketchUp for Web is available without a subscription, you will still need a Trimble ID to use it. See Trimble ID for more information about creating or logging into your Trimble ID. To access all features discussed here, you may need a SketchUp Go, Pro, or Studio subscription.
Creating a New Model
When you first open SketchUp for Web you will see your Home page. To create a new model, you can click Create New or use the dropdown menu to select your desired unit of measurement.

Changing the Unit of Measure
You can change the unit of measure used in your model at any time in App Settings. From the Main Menu, select App Settings and find the Default Template section in the General tab.

Importing Files and Images
With SketchUp for Web you can import files directly into your model. You can import files saved in the following formats:
3DS
DAE
DEM
DWG
DXF
KMZ
STL
JPG
PNG
To import a file:
Select Import from the Main Menu.
Choose where your file is located; either My Device or Trimble Connect.
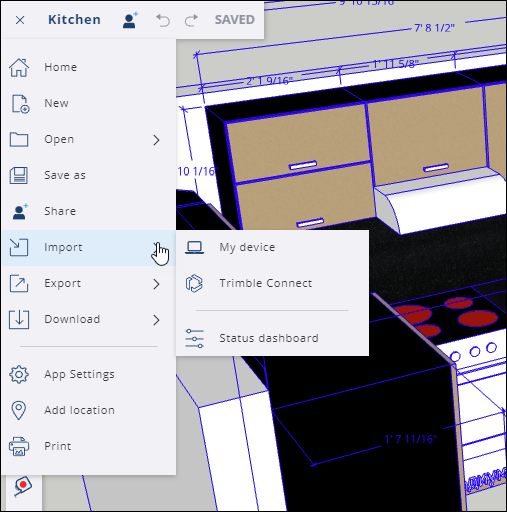
If importing from your device, drag and drop the file into the window that appears, or use the link provided to browse for the image.
If importing from Trimble Connect, locate and select the file you would like to import from your saved projects.
Image files imported into your model become either an image or material. If you import a CAD file it becomes a component. For more information on how to use imported files in your models, see Using SketchUp Data with Other Modeling Programs or Tools.
SketchUp for Web's Panels
SketchUp for Web's panels appear on the right side of the interface. Each panel provides a specific set of features to help take your model to the next level.